Updating Your AWS Account API Access
This guide walks you through updating the AlphausAccountAccess CloudFormation stack for your AWS billing account. Follow the steps below, and refer to the Troubleshooting section if you encounter any issues. Contact customer support by clicking the Contact Support button in the Octo UI if the error you are experiencing isn’t documented here.
Step 1: Delete the Existing Stack in AWS
- Click Open AWS stack page in Octo. Ensure you are signed in to the correct AWS billing account.
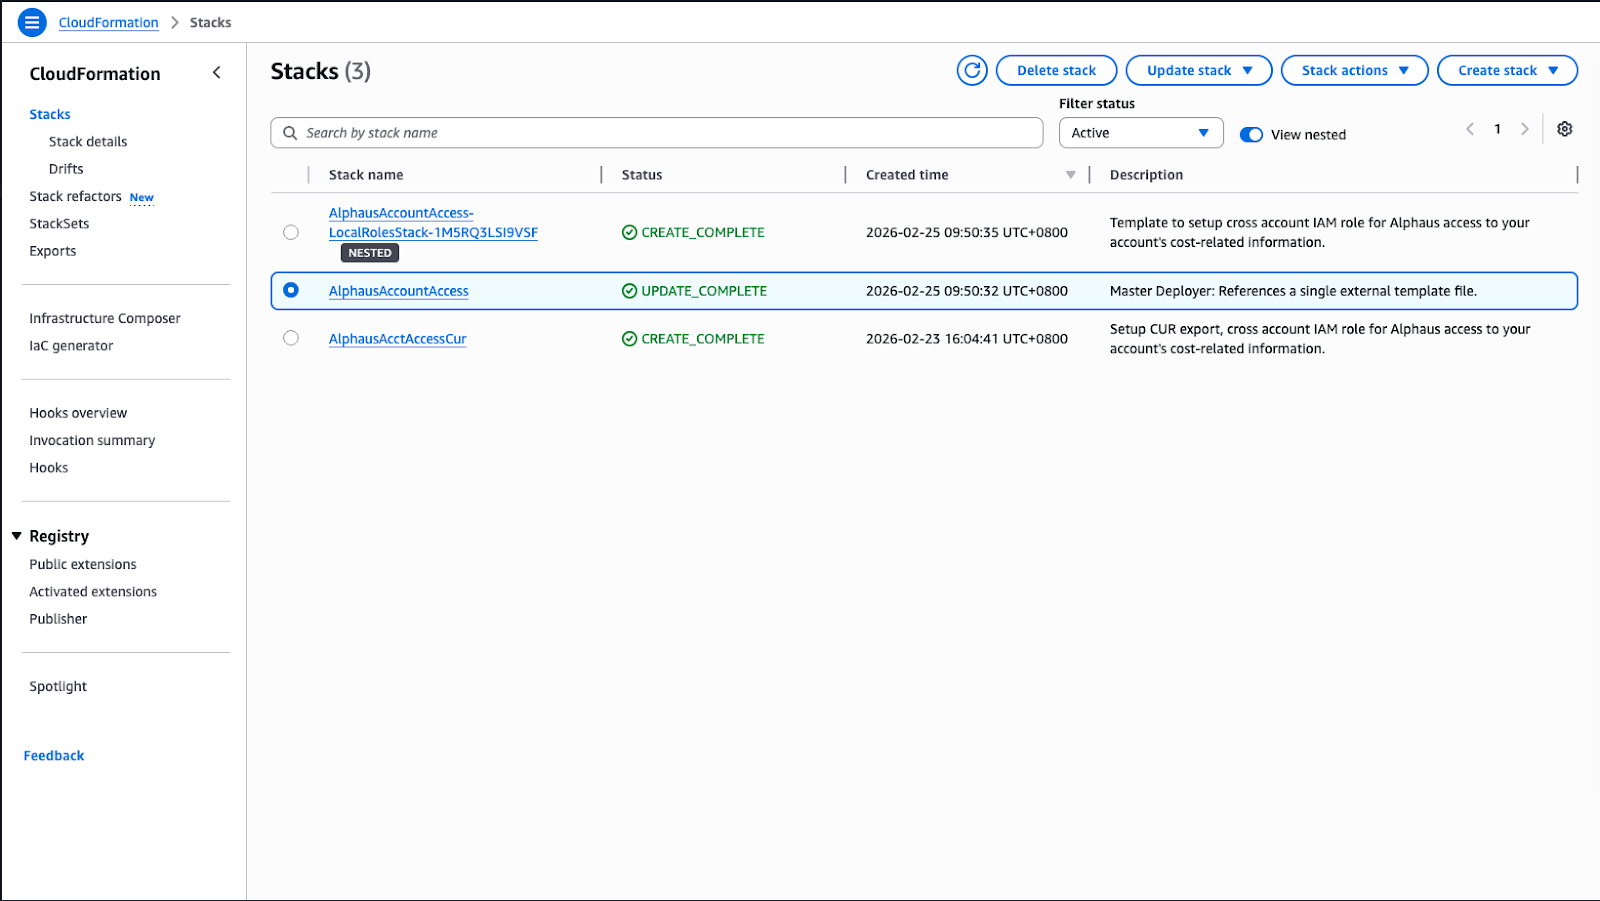
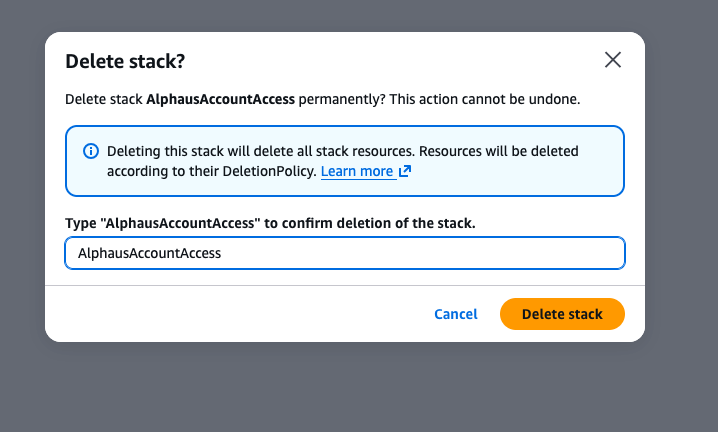
- In the Stacks page, locate and select AlphausAccountAccess, then click Delete.
- Confirm the deletion and wait for it to complete.
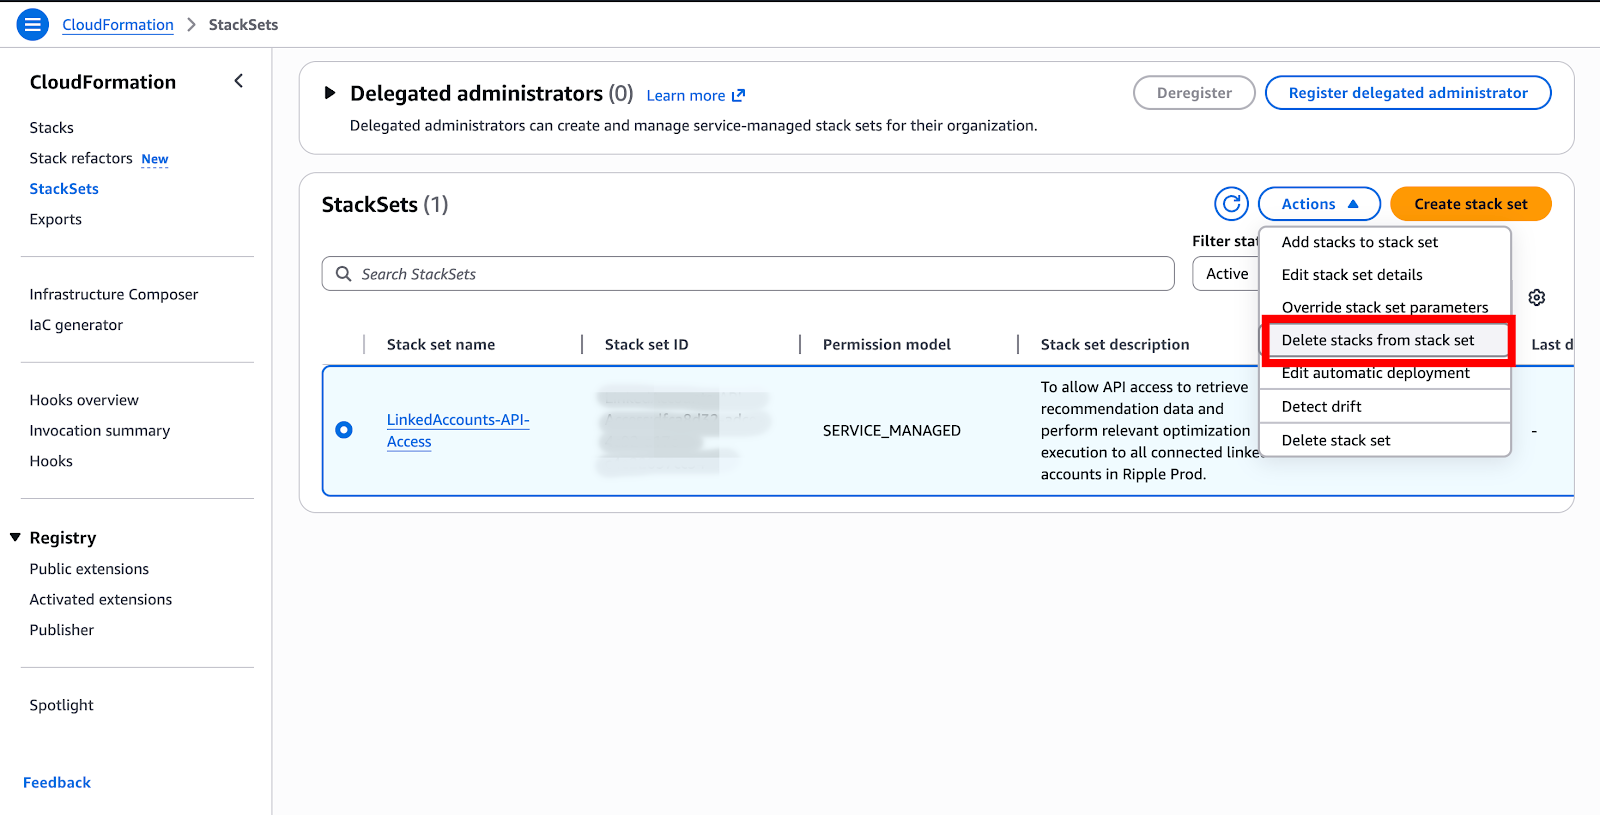
- If you have a StackSet deployed, delete it as well before proceeding.
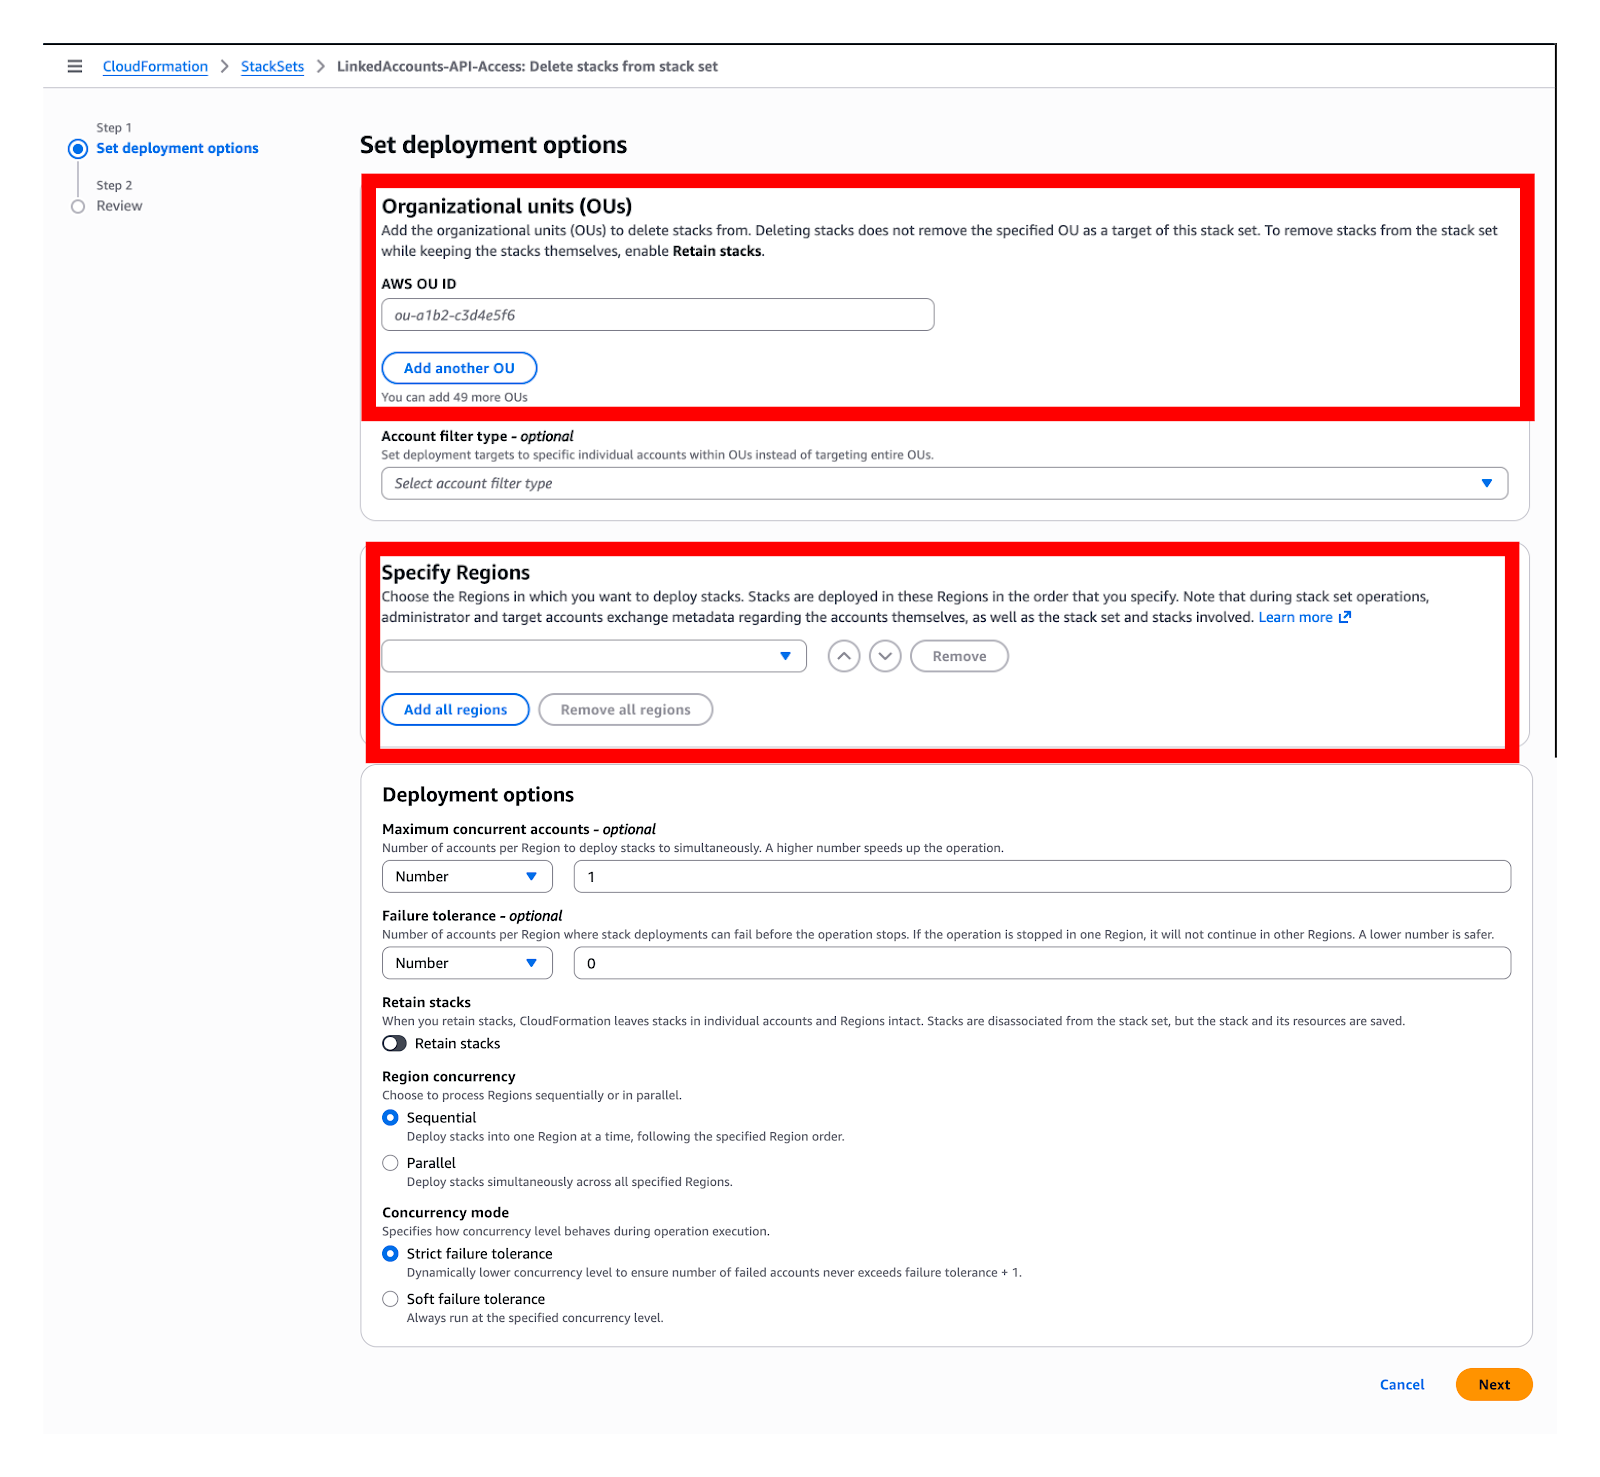
Here is the step by step process of deleting the stack.
- Select the stackset. Click Actions and click delete stacks from stacke set. This is done to delete initially the deployed stacks per linked accounts.
- Provide the root Id and select the Region. Click Next.
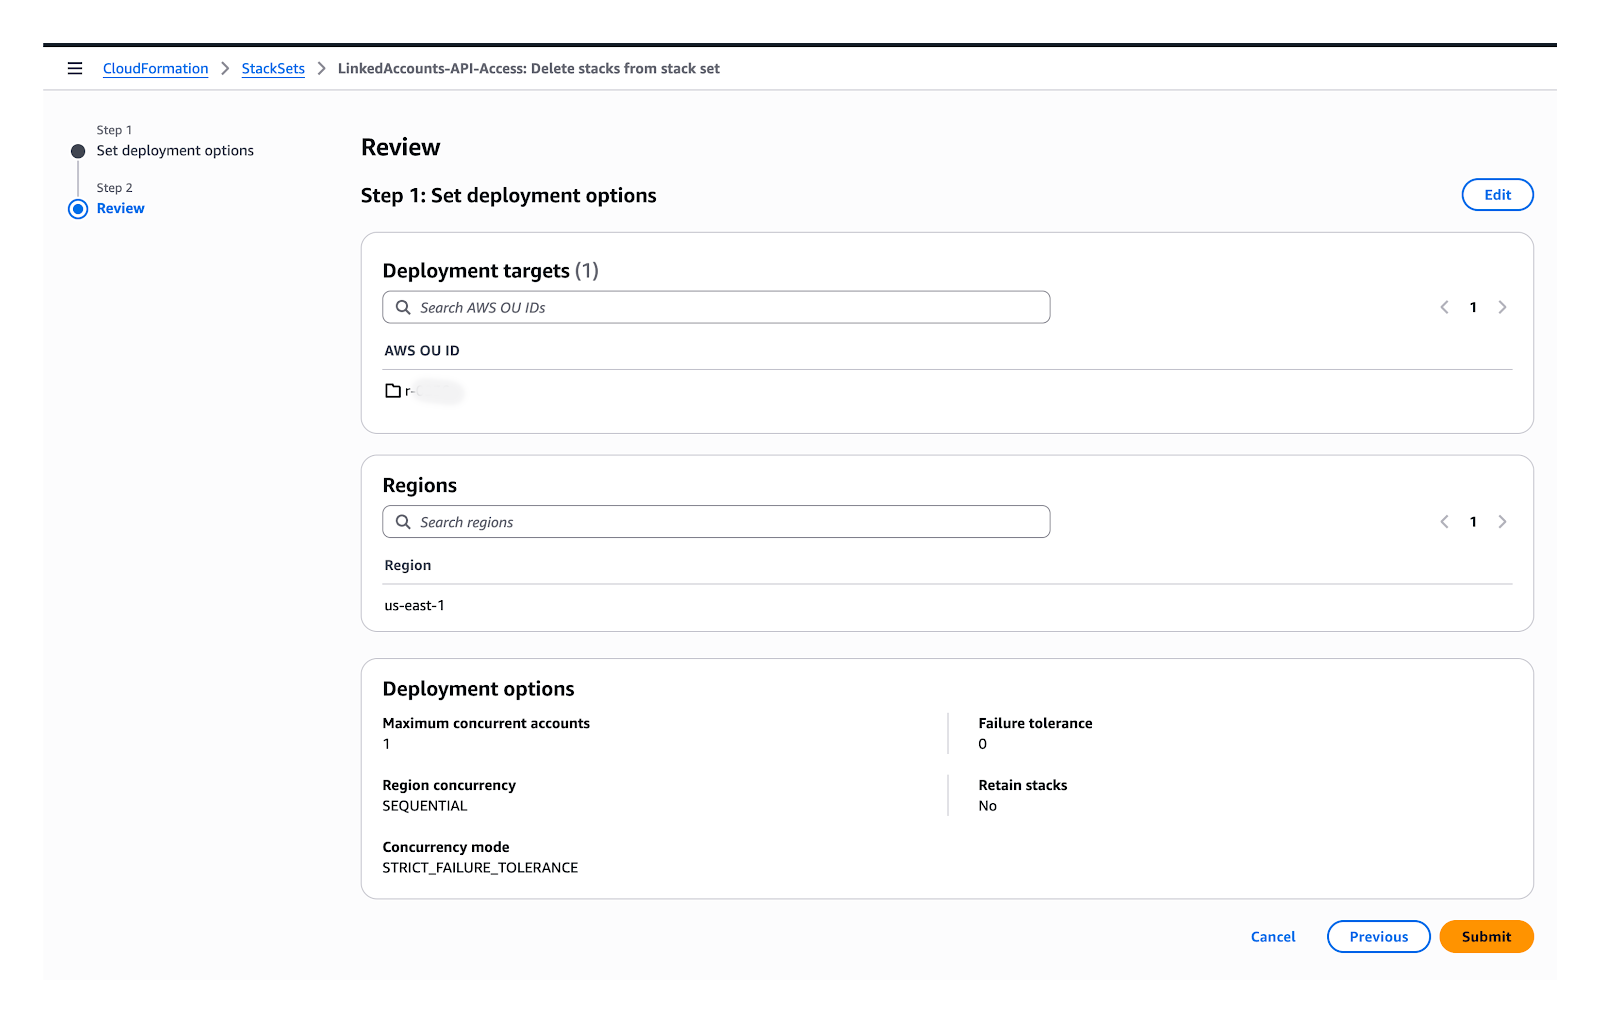
- Review and click Submit.
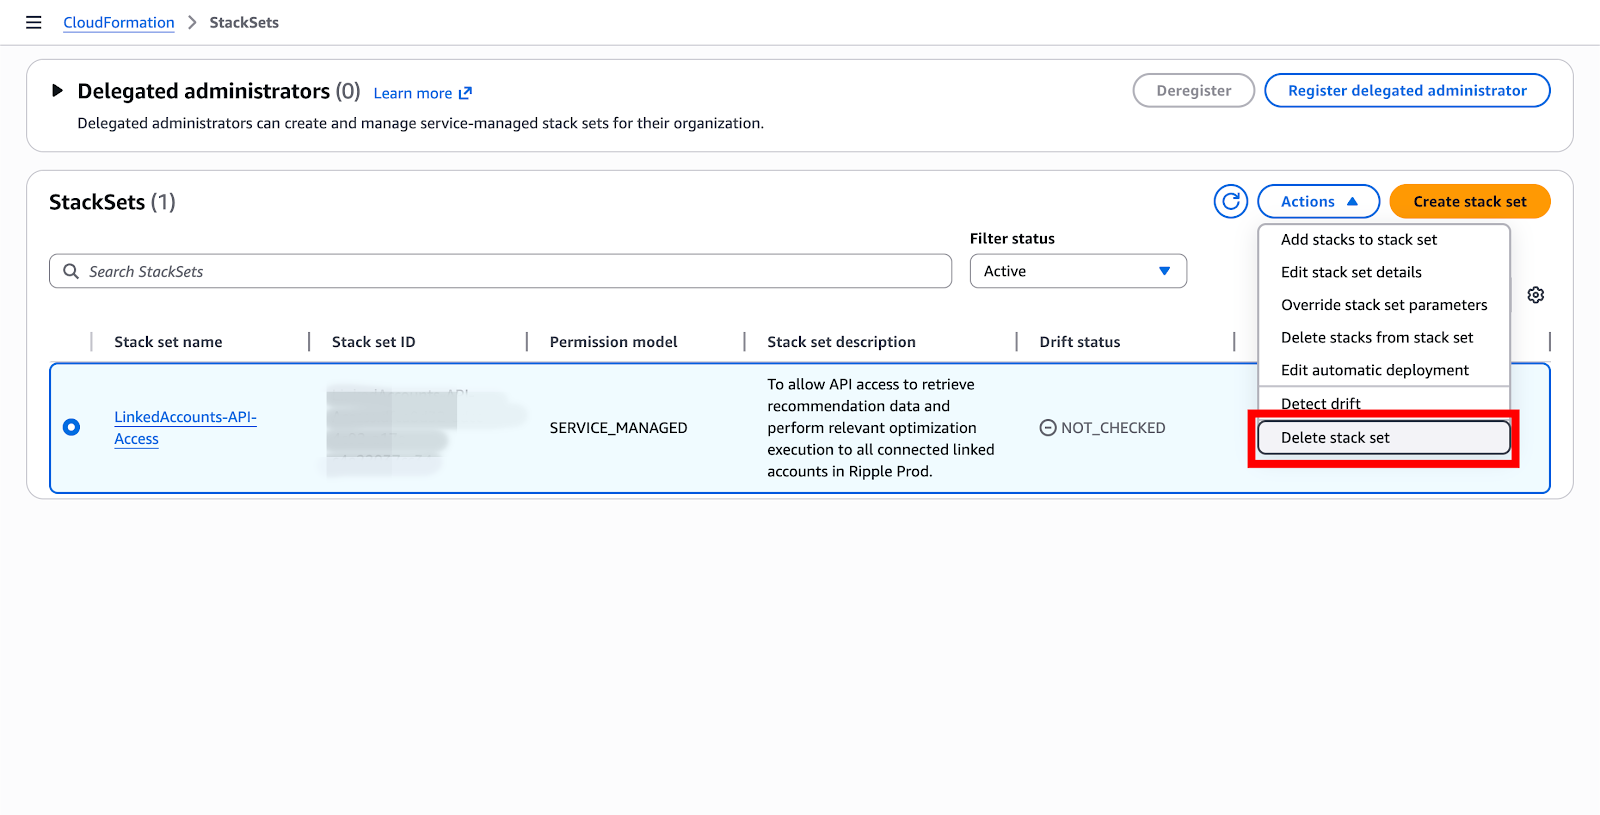
- Go back to the listing page. Click the stackset, click Actions and click Delete stack set.
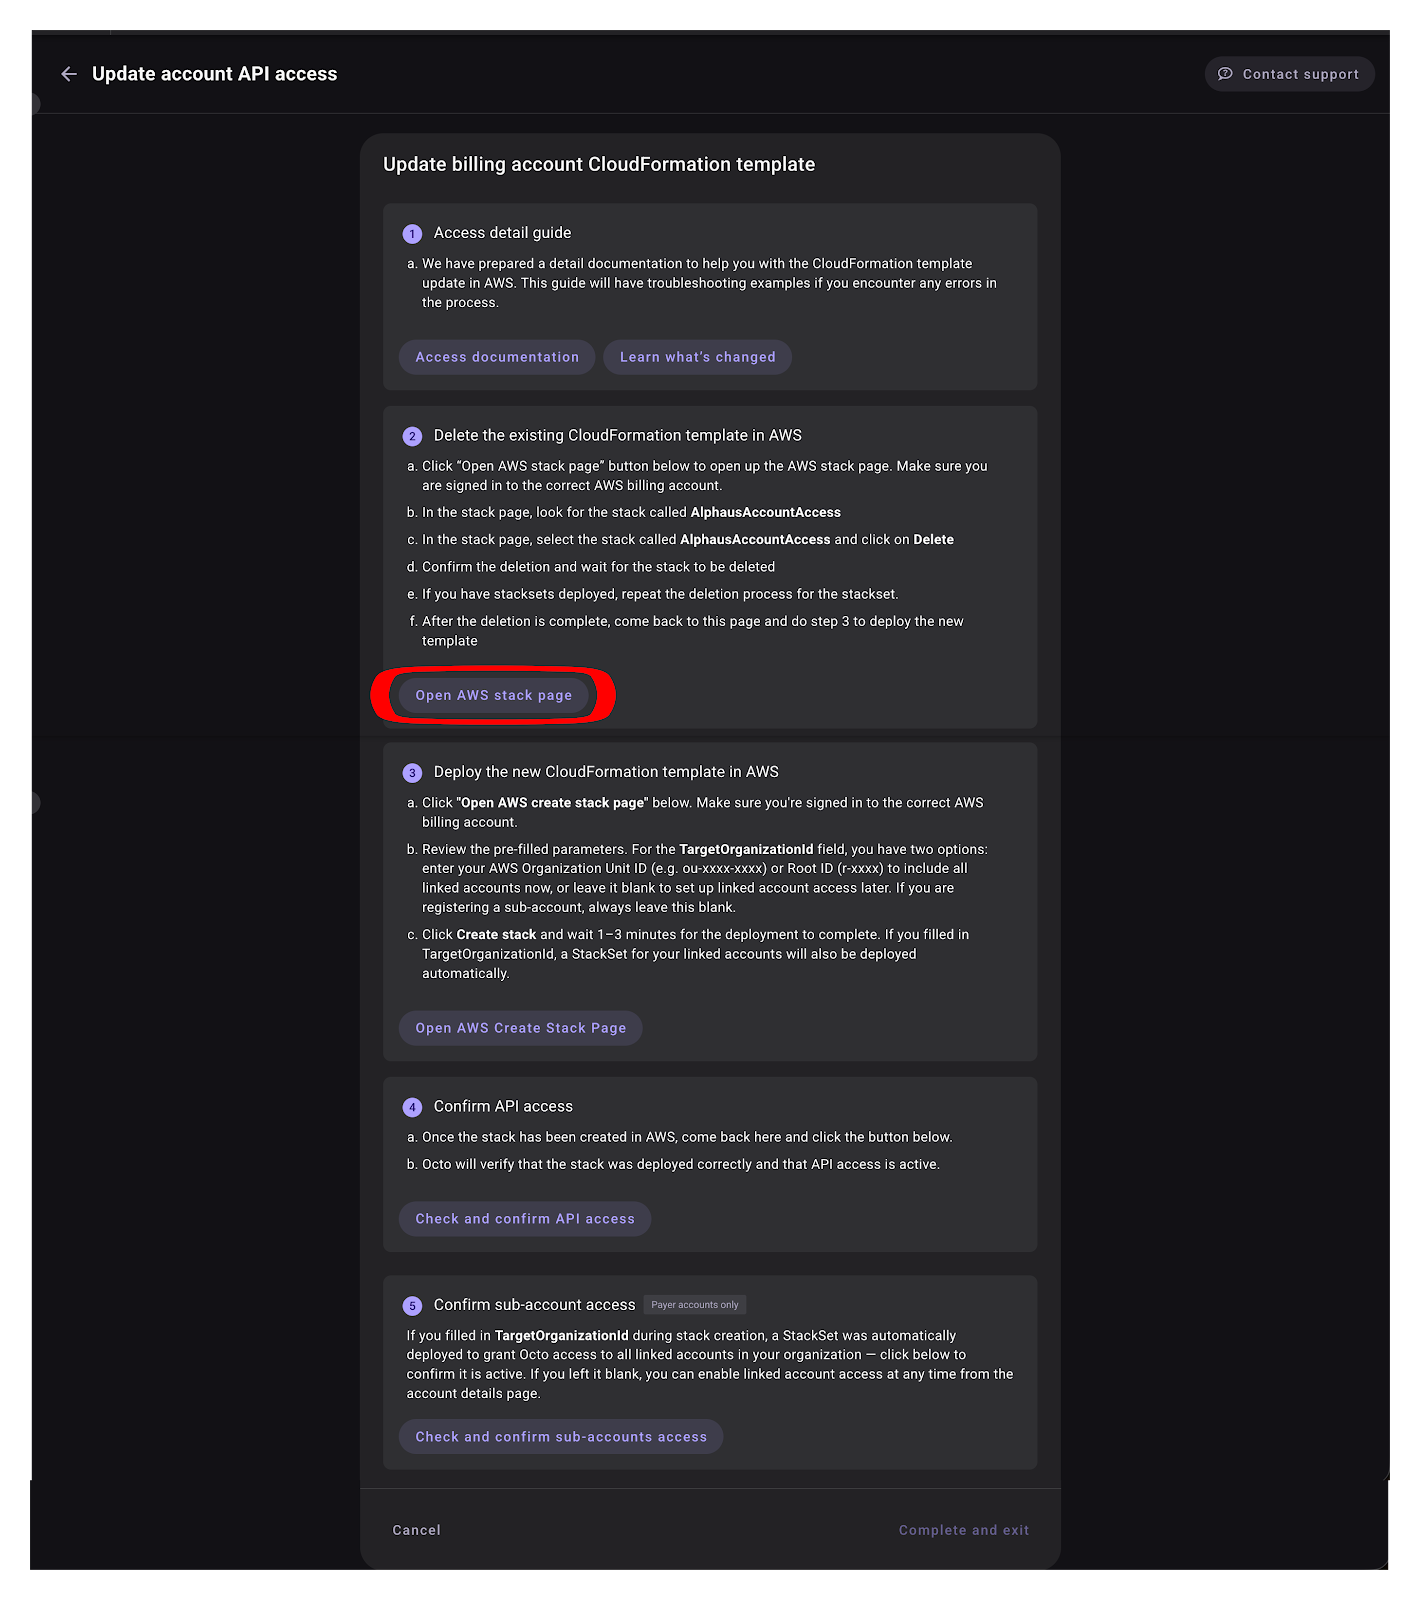

Step 2: Deploy the New Stack
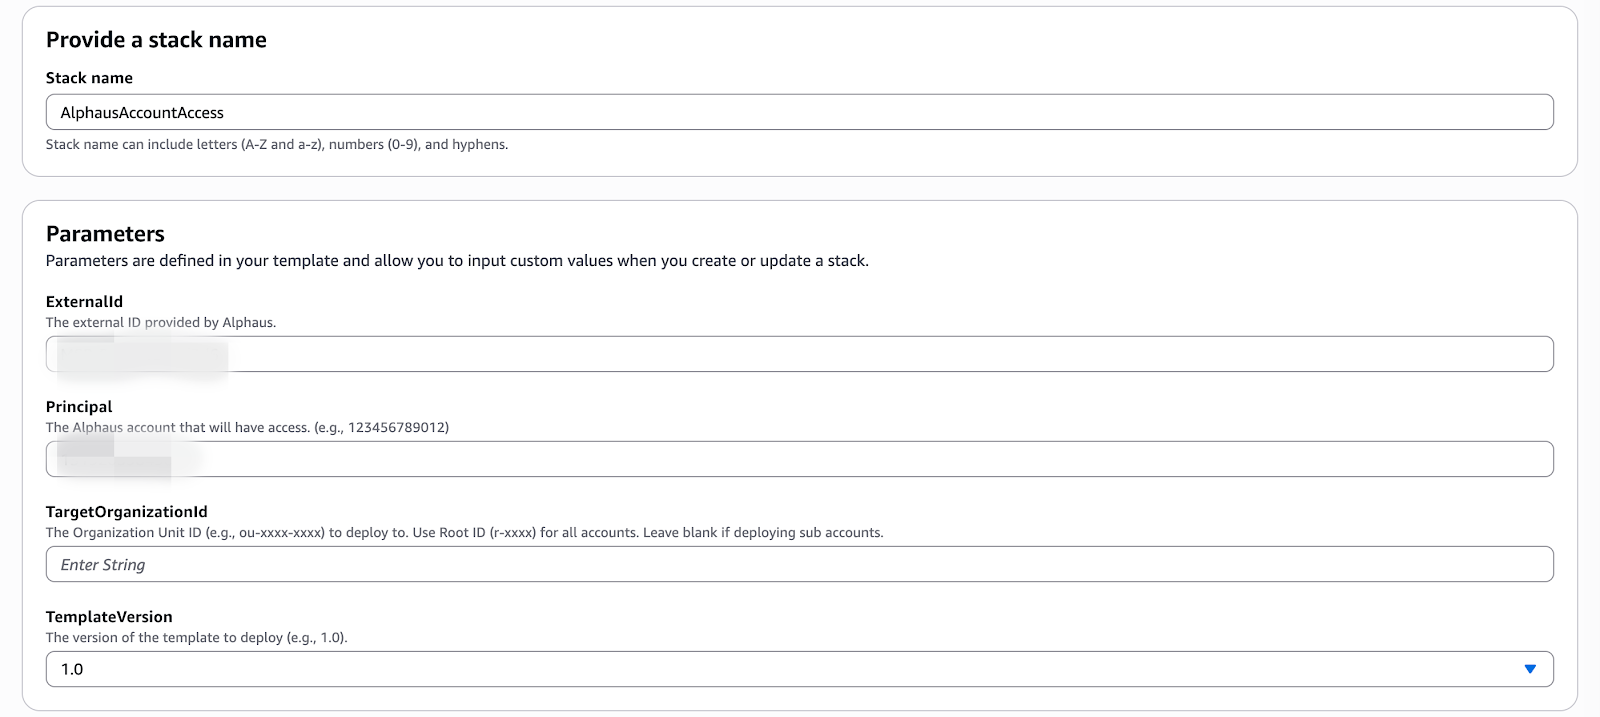
- Click Open AWS Create Stack Page in Octo. Ensure you are signed in to the correct AWS billing account.
- Review the pre-filled parameters. For TargetOrganizationId:
- Enter your AWS Organization Unit ID (e.g.
ou-xxxx-xxxx) or Root ID (e.g.r-xxxx) to automatically include all linked accounts. - Leave it blank to set up linked account access later, or if you are updating a sub-account.
- Enter your AWS Organization Unit ID (e.g.
- Click Create stack and wait 1–3 minutes for deployment to complete.

Info
If you provided a TargetOrganizationId, a StackSet granting access to all linked accounts will also be deployed automatically.
Step 3: Confirm Access in Octo
Once the stack is deployed, return to Octo:
- Click Check and confirm API access — Octo will verify the stack was deployed correctly and that API access is active.
- (Payer accounts only) Click Check and confirm sub-accounts access to verify the StackSet is active. If you left
TargetOrganizationIdblank, you can enable this at any time from the account details page.
Troubleshooting
I entered the wrong Organization ID
- Delete the AlphausAccountAccess stack (see Step 1).
- Redeploy using Step 2 with the correct
TargetOrganizationId.
I registered a sub-account before its payer account
When you later register the payer account with a TargetOrganizationId, it may conflict with the sub-account's existing stack.
Warning
The sub-account name from the previous registration will be overwritten.
- Delete the AlphausAccountAccess stack in the sub-account.
- Delete the AlphausAccountAccess stack in the payer account that is showing the error.
- Redeploy using Step 2.

I opened the AWS stack page but I'm signed in to the wrong AWS account
The Open AWS stack page and Open AWS Create Stack Page buttons open directly in whichever AWS account is currently active in your browser. If you are signed in to the wrong account, the AlphausAccountAccess stack will not be found, or changes will be applied to the wrong account.
To fix this:
- In the AWS Console, click your account name in the top-right corner and select Sign out.
- Sign in to the correct AWS billing account.
- Return to Octo and click the button again to reopen the page under the correct account.
Tip
You can verify you are in the right account by checking that the 12-digit Account ID shown in the AWS Console top-right matches the AWS Account ID registered in Octo.