AWS Account Registration
Octo supports registering AWS accounts through AWS Console and Terraform.
- AWS console: requires you sign-in to your AWS account and deploy stacks or stackset in your AWS account.
- Terraform: deploy the necessary resources in your AWS account using our terraform module
These registreation methods enable Octo to retrieve usage and billing data, perform API operations, and optionally register linked accounts under a payer account.
Via AWS Console
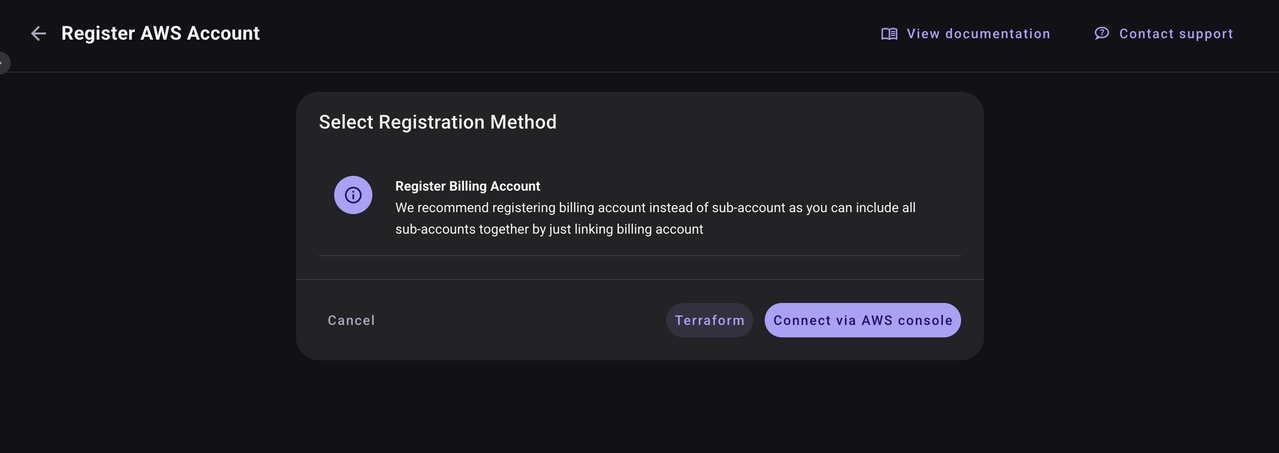
Step 1: Select Registration Method
Choose Connect via AWS Console.
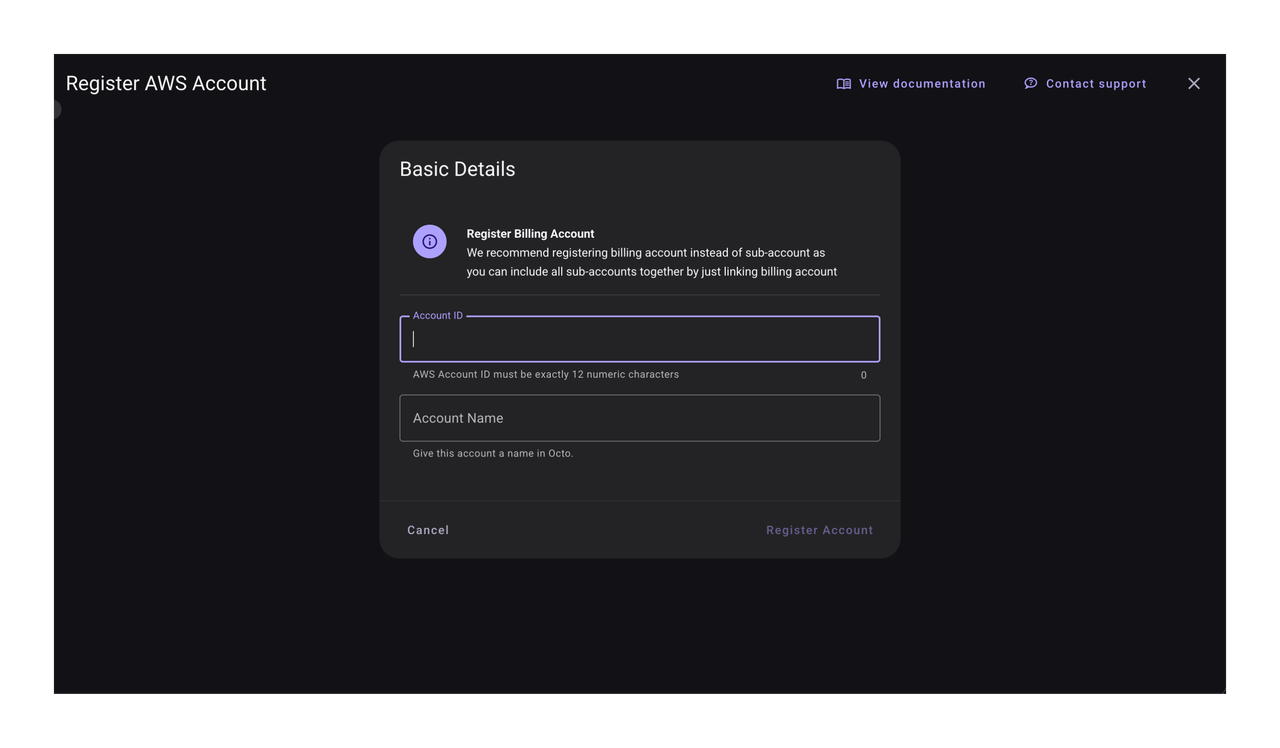
Step 2: Basic Details
Recommended to register billing account (AWS payer account)
We recommend registering your AWS billing account (payer account) instead of the sub-accounts (linked accounts) to fully explore Octo's capabilities.
a. Input your AWS Account ID (12 digits)
b. Input Account Name
c. Click Register Account
Octo will double check whether existing account has already existed in the system. If the account name or the AWS account ID exist in Octo it will prompt a error banner.
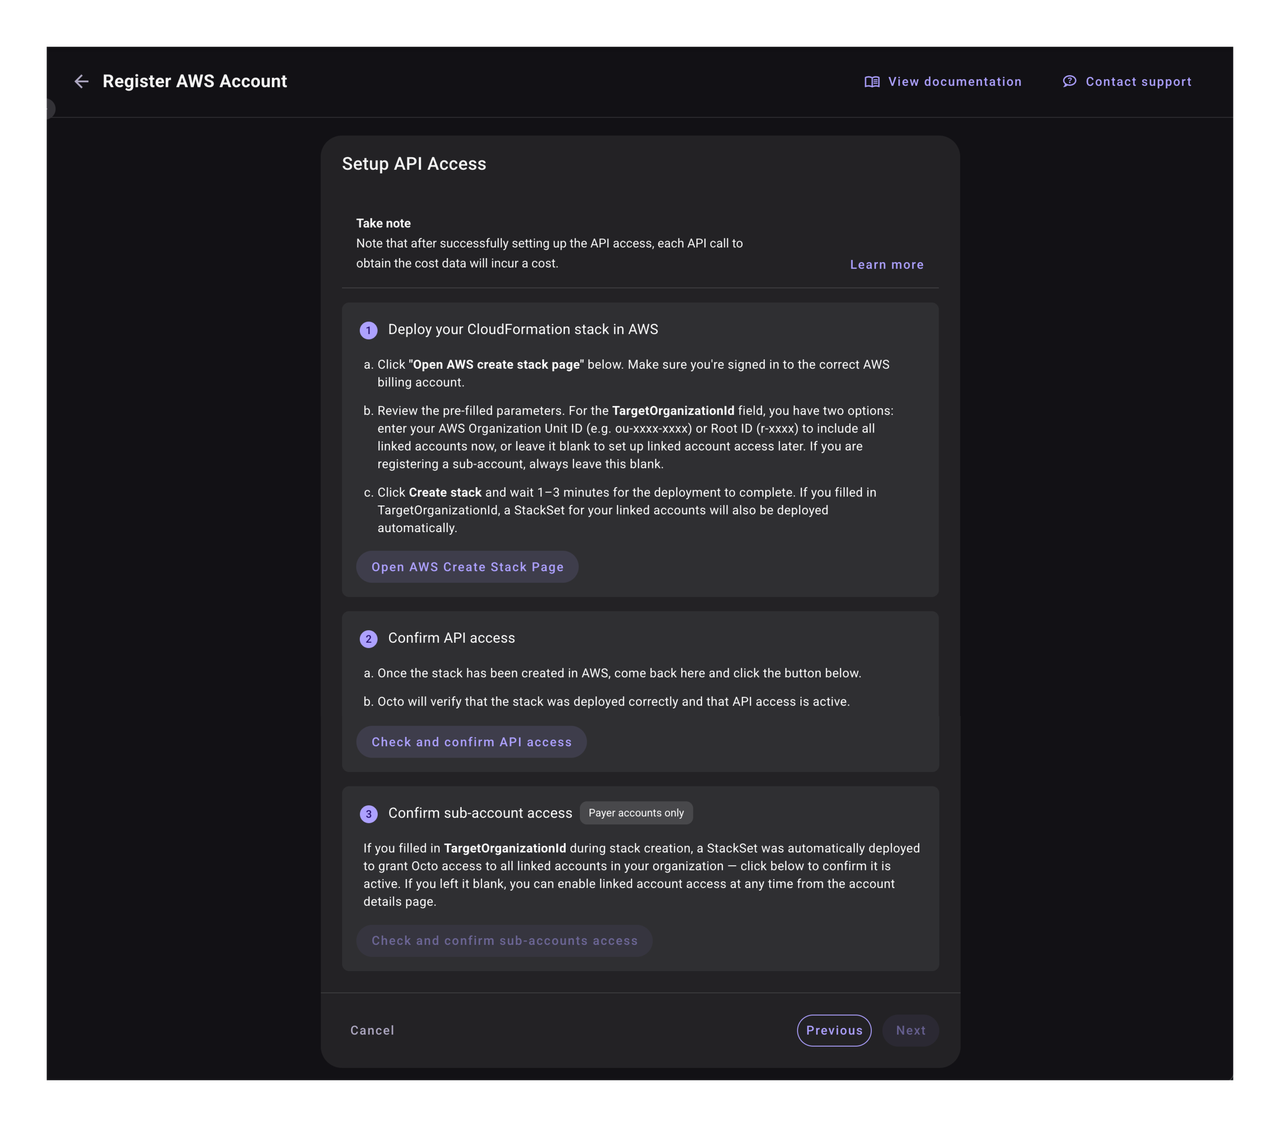
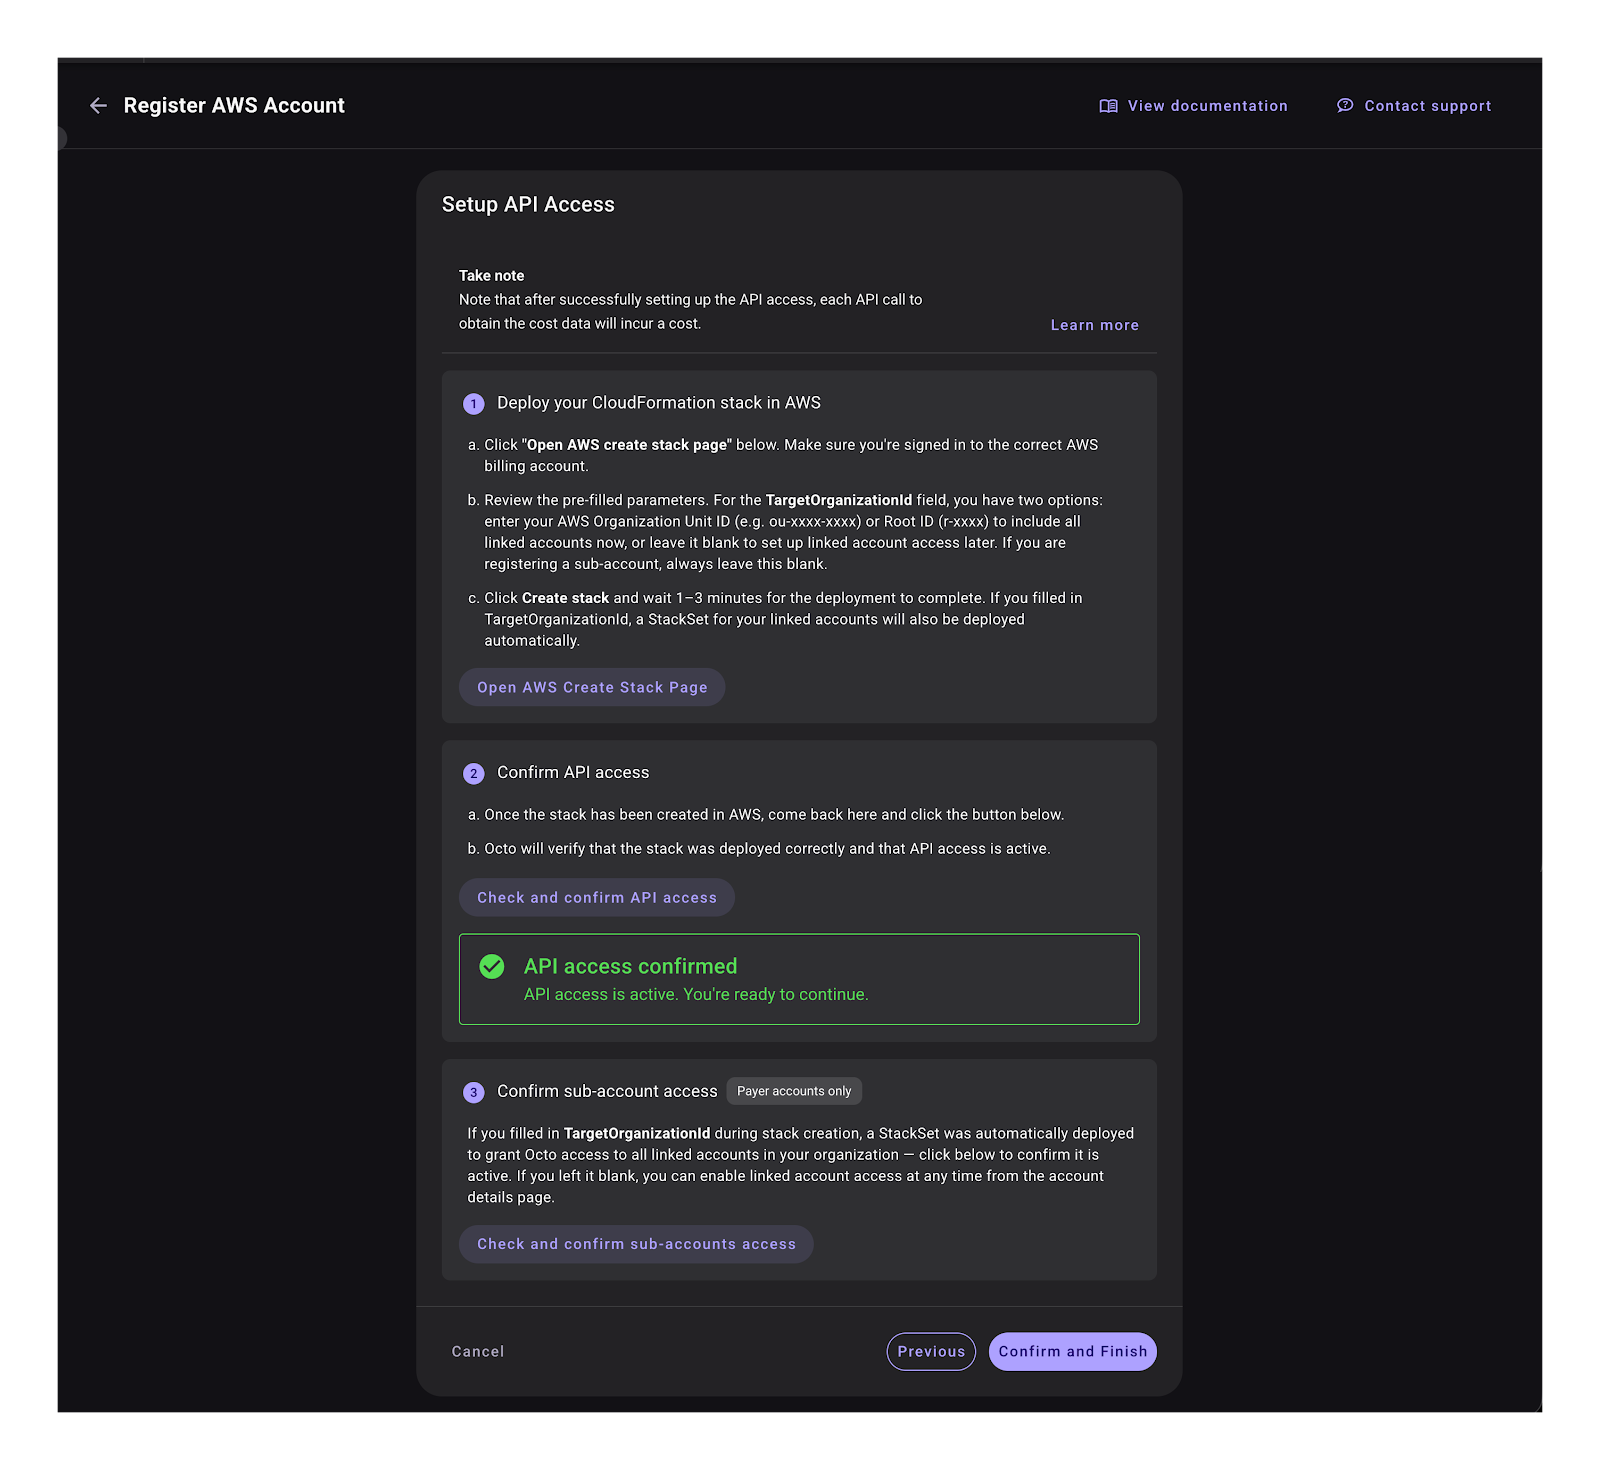
Step 3: Setup API Access
In this step it will deploy a stack in your AWS account, this will setup needed permission to allow Octo to perfome API Operation in your account. You can learn more about how this is done with CloudFormation template here
a. Click Open AWS create stack page
This will bring you create stack page in your currently signed-in AWS account, make sure you deploy the stack in your intended account, default region would be us-east-1.
b. In the stack form page in AWS, please check default values when creating stack:
- Stack name (You can retain the value or input your desired stack name.)
- ExternalId (Do not change.)
- Principal (Do not change.)
- TemplateVersion (Make sure that you are in the latest version)
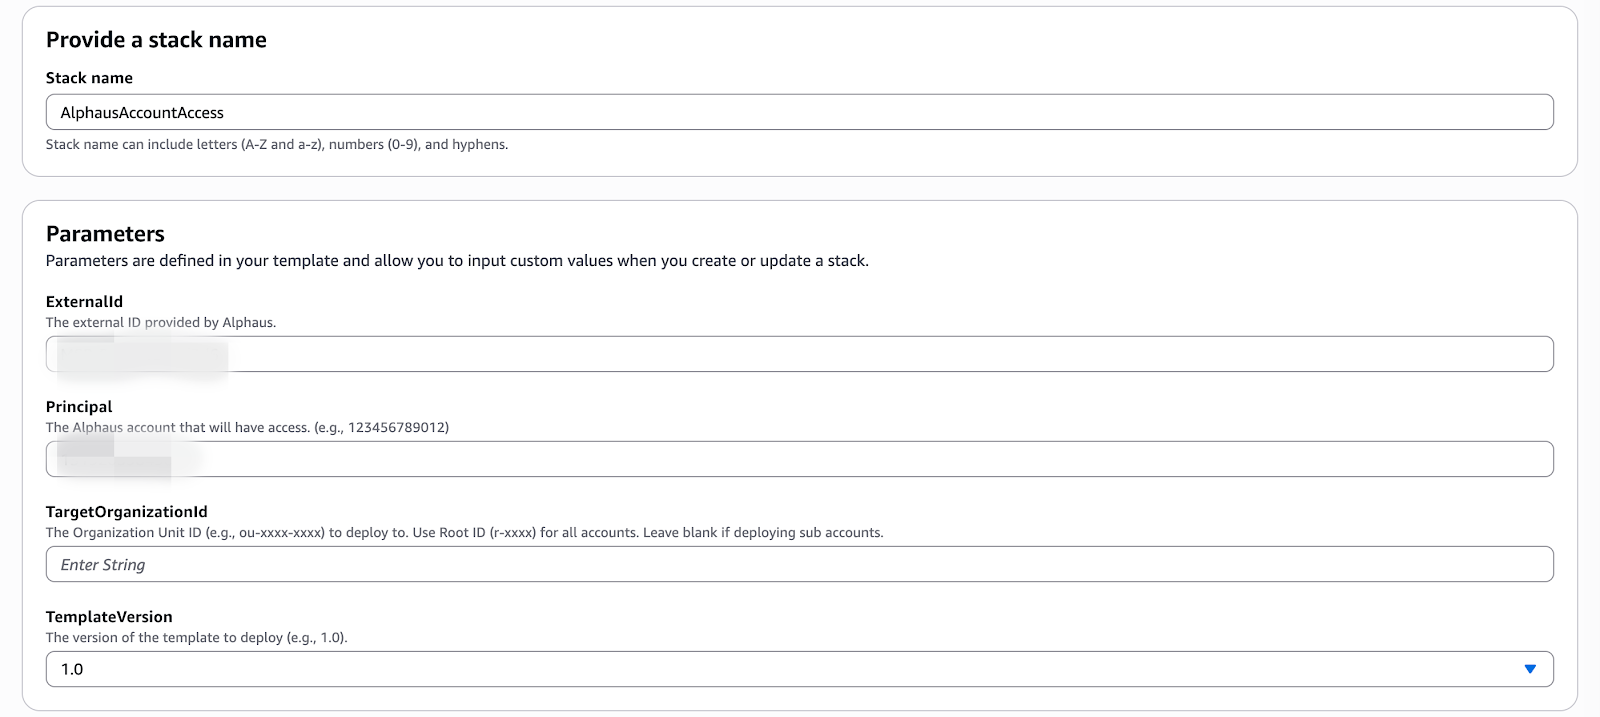
c. Fill in the TargetOrganizationId if you are registering a payer account and prefer to deploy the stack to the linked accounts.
- Click search in the AWS Console and type AWS Organizations.
- Click the service and find the Id in the AWS Organizations.
- Choose whether you want to have Octo permissions to a specific team or to the overall organization.
- If you choose a specific team, then get the ou-id.
- Else if you decided to connect the overall organization to Octo, then get the root id
- Paste it to the TargetOrganizationId field in the CloudFormation setup.
d. Check the stack details and at the end of the page Tick the checkbox to agree that says "I acknowledge that AWS CloudFormation might create IAM resources with custom names. message."
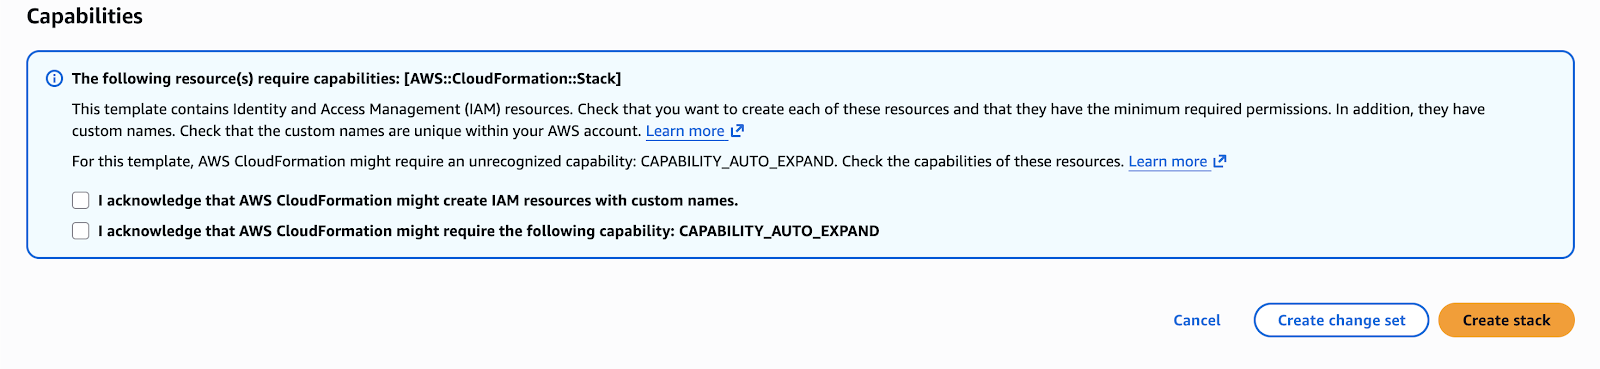
e. Click Create stack button. If create stack is success, go back to Octo.
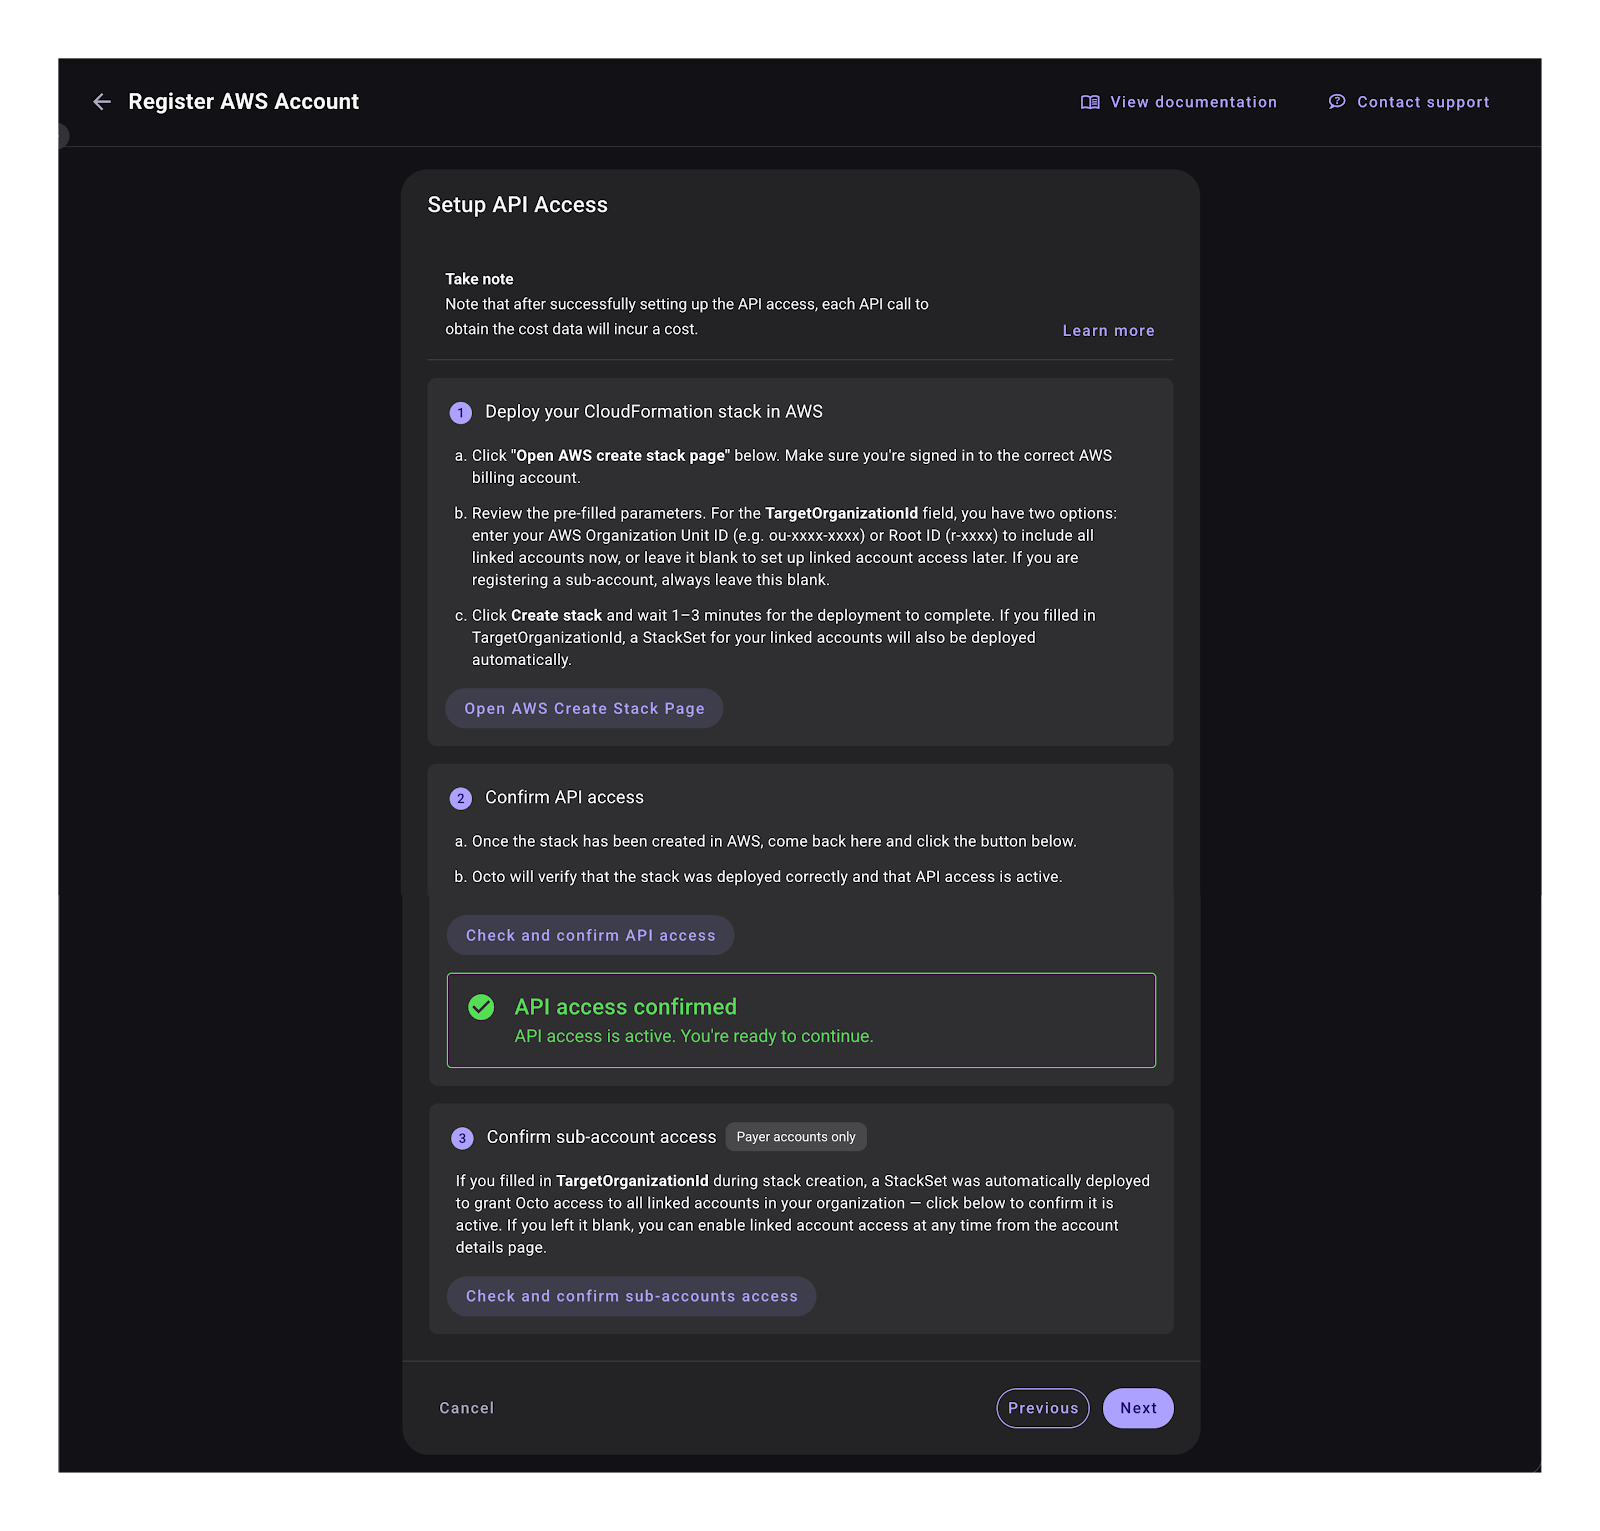
f. Back in Octo, Click Check and Confirm API access to verify the deployment.
g. The verification will check whether your AWS account is a billing (payer account) or a sub-account (linked account)
Sub-account (Linked account)
If the account is a sublinked, you can click the Confirm and Finish button to finish the registration.
Biling account (Payer Account)
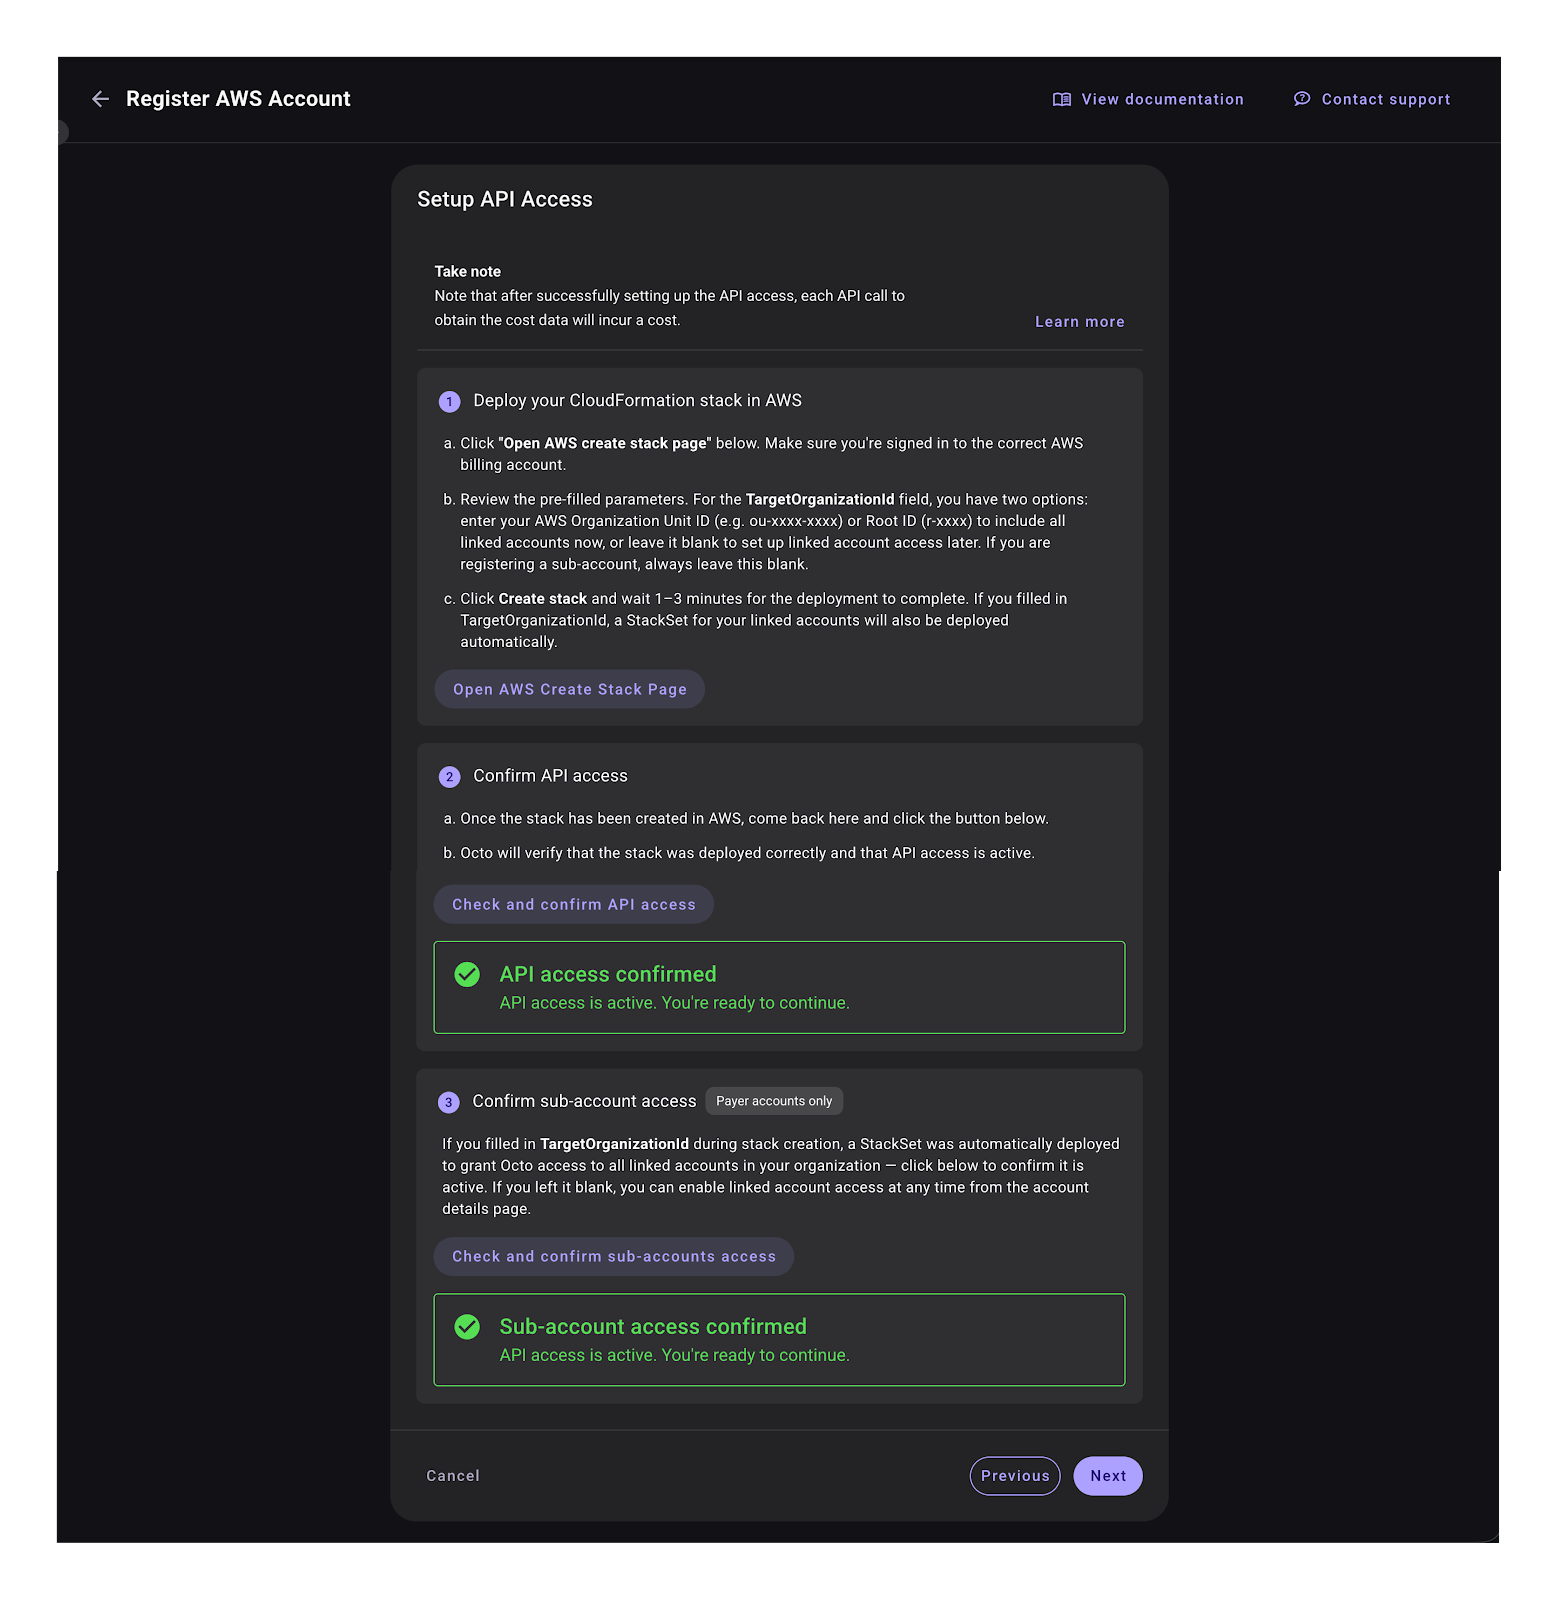
If payer then click Check and confirm sub-account access and then click Next to proceed with additional steps for payer accounts.
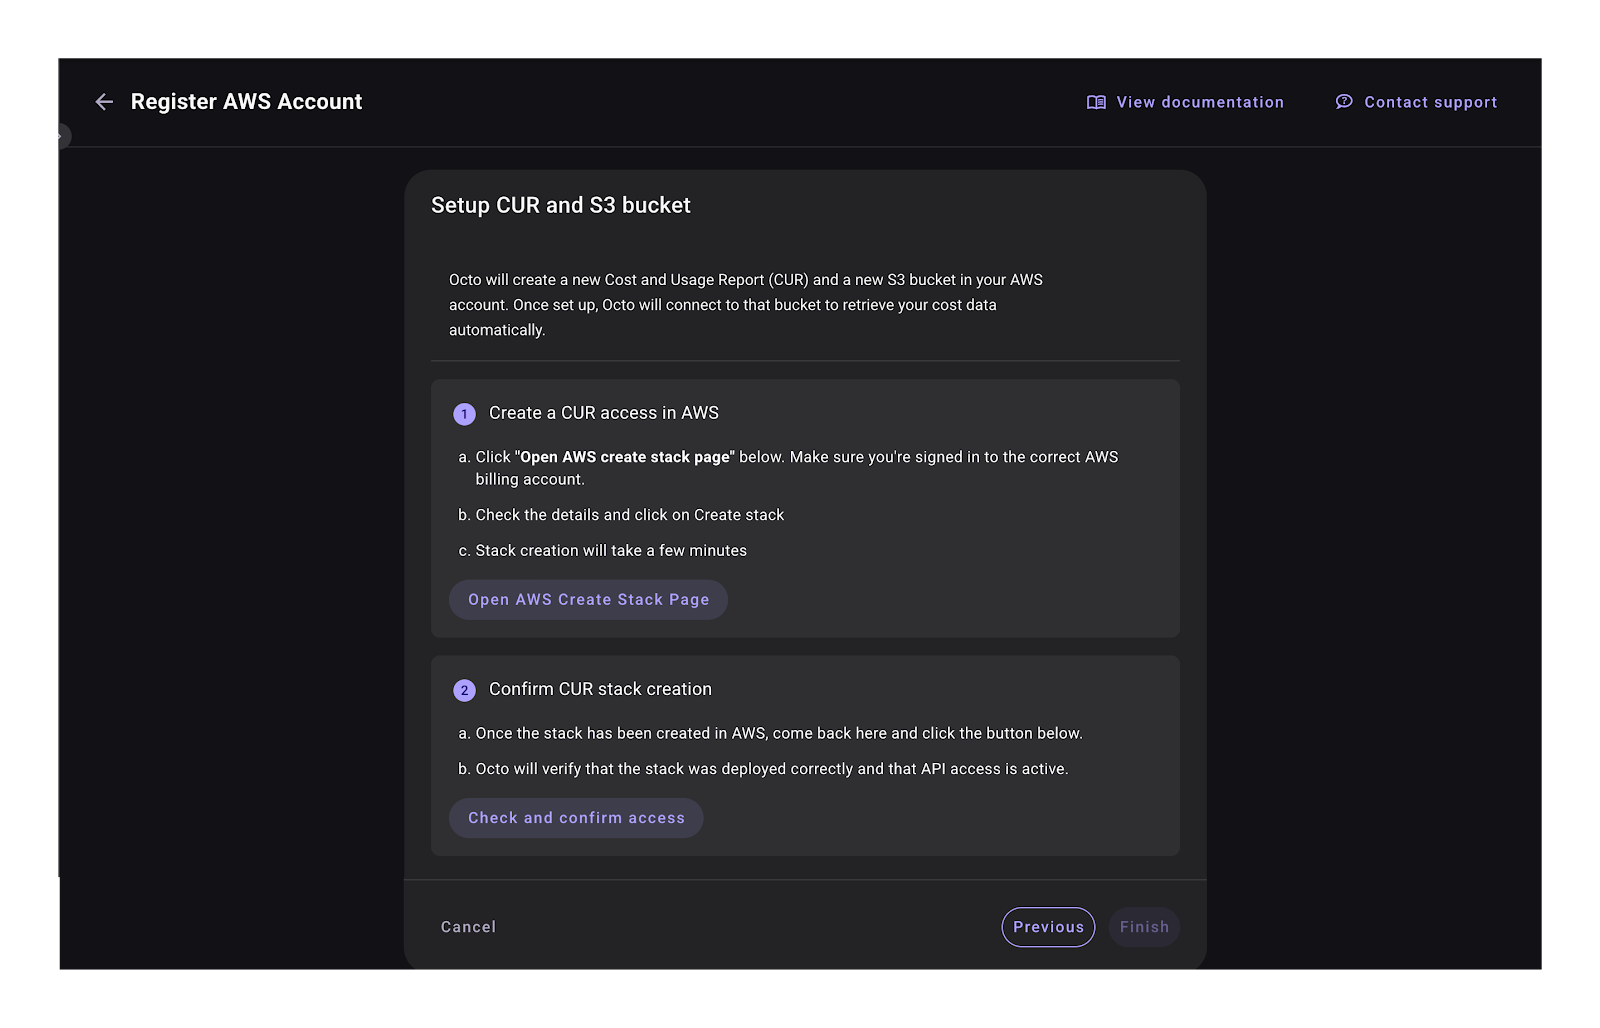
Step 4: Setup CUR and S3 bucket (Payer account only)
If you initially connected to Payer account in the previous step. You will see this step. To pull your AWS data to Octo, there is a need to setup the CUR and S3 bucket for payer accounts.
Setup CloudFormation using default configuration
The CUR export settings and the target S3 bucket will be deployed to us-east-1 region.
-
Click
Open AWS Create Stack Page -
Clicking the button above will take you to your CloudFormation console
-
Please make sure that it is deployed on the default
us-east-1region -
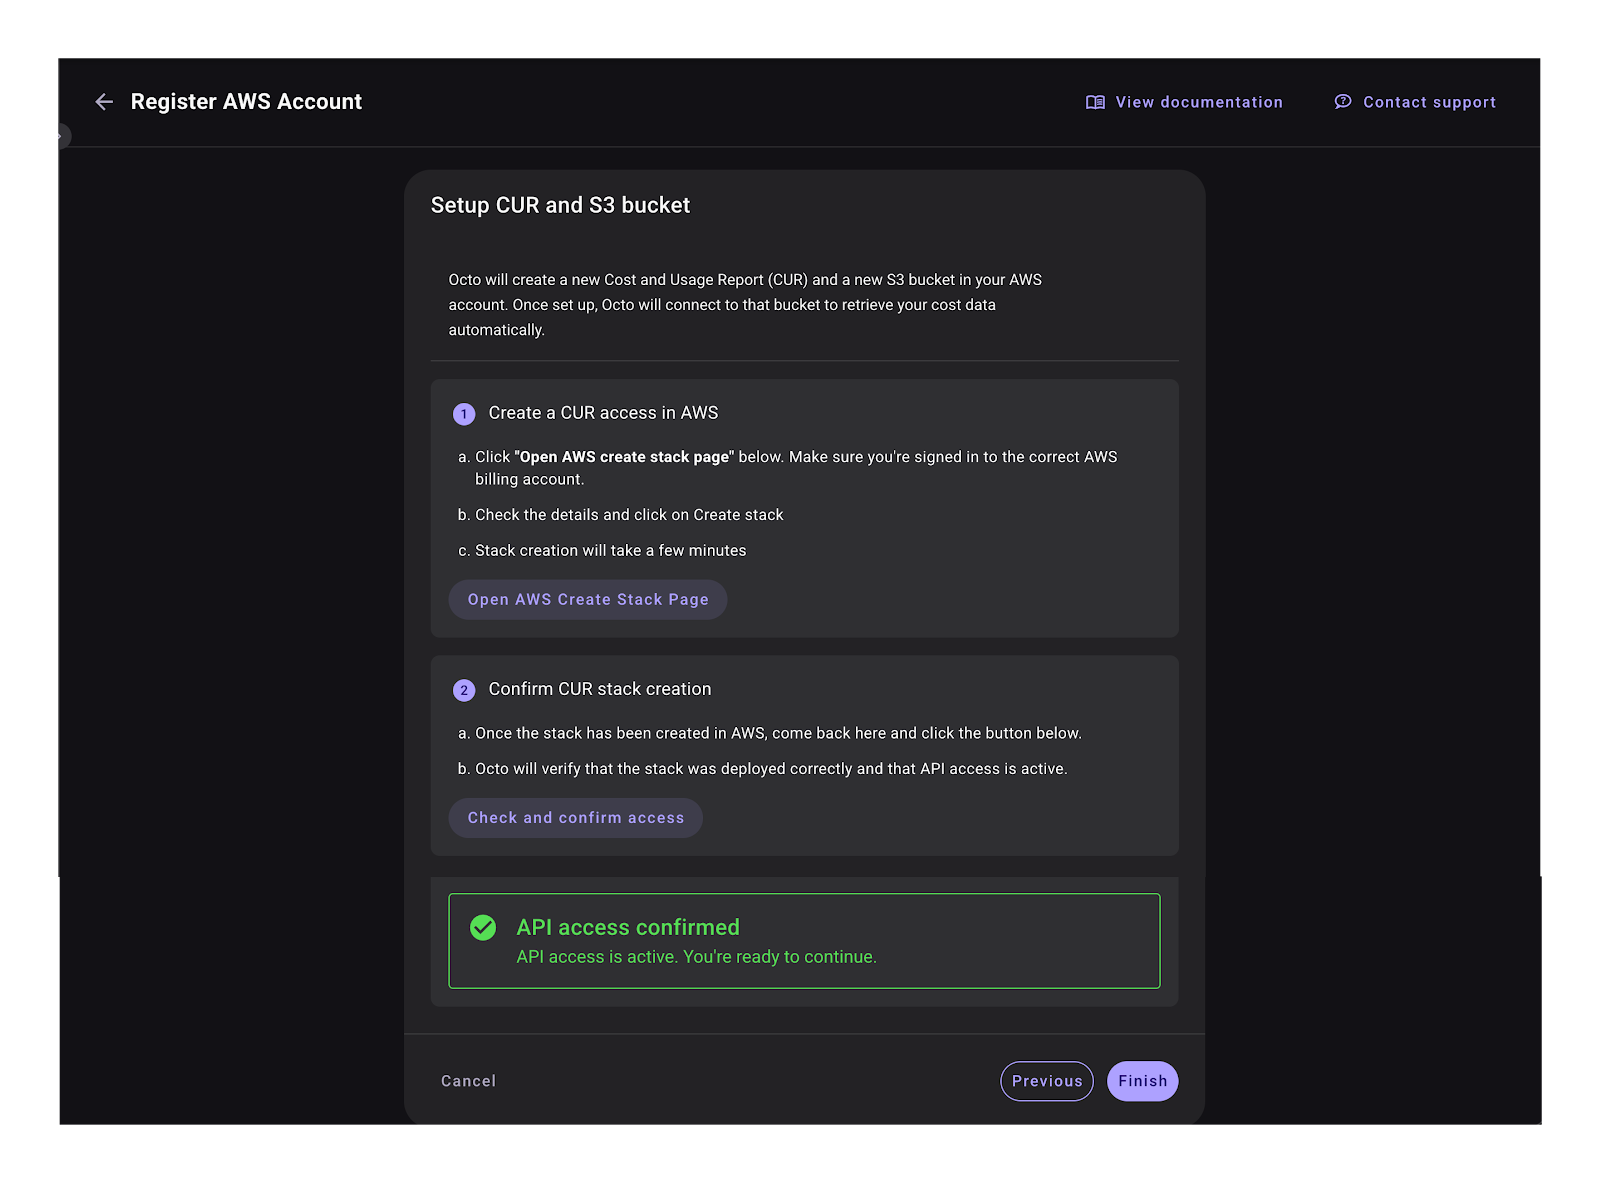
Once you're done, go back to Octo and click
Check and Confirmto start the verification process -
Once, successful, click Finish.

Via Terraform
You must have terraform installed in your local machine to proceed. You can follow this guide
(Optional) If you prefer to use AWS CLI for authenticating your AWS account, you can follow this guide.
-
Select Registration Method
ClickVia other options, choose Terraform -
Basic Details
This step will save your account's Id and name if provided.a. Input your AWS Account Id (12 digits)
b. Input Account Name
c. Click Register Account
d. If there is no error, then click
Next
-
Check this terraform module, from there you can read it's README section for more detailed information about the module and the required inputs.
-
Run terraform init, this initializes a working directory containing Terraform configuration files, terraform plan to check what resources will be created, and terraform apply to create those resources. You can also check here for more information about the Terraform CLI.
-
After running those commands above, check if the deployments are successful, if so, click
Check and confirmto verify. You can also check in your AWS account console to see if the resources are properly created. -
On Octo, you can see the status of the deployments for API Access, CUR and S3 bucket (For payer account only), and multiple account API access - optional (For payer account only).
-
If API Access is successful, you can click
Confirm and Finish

For Payer accounts, if it's registered without using stackset, you can still enable it by doing the steps above, just make sure you set the use_stackset to true in the terraform module, it will update the resources and automatically register all your linked account to Octo, there is no need to delete your payer account and register again.